Get ‘er done

Ever get part way through a pattern and realize something doesn’t make sense? You don’t have meters of extra fabric to cut it differently or in this case, you can’t just drop by the fabric store for new notions because they aren’t open for store shopping. In these cases, I adopt a ‘get ‘er done’ attitude and that’s where I learn a lot about what is possible. Does it look perfect when I am done? Ummmmm probably not but it probably looks a lot better than the mass produced dress someone else is wearing… or I hope.

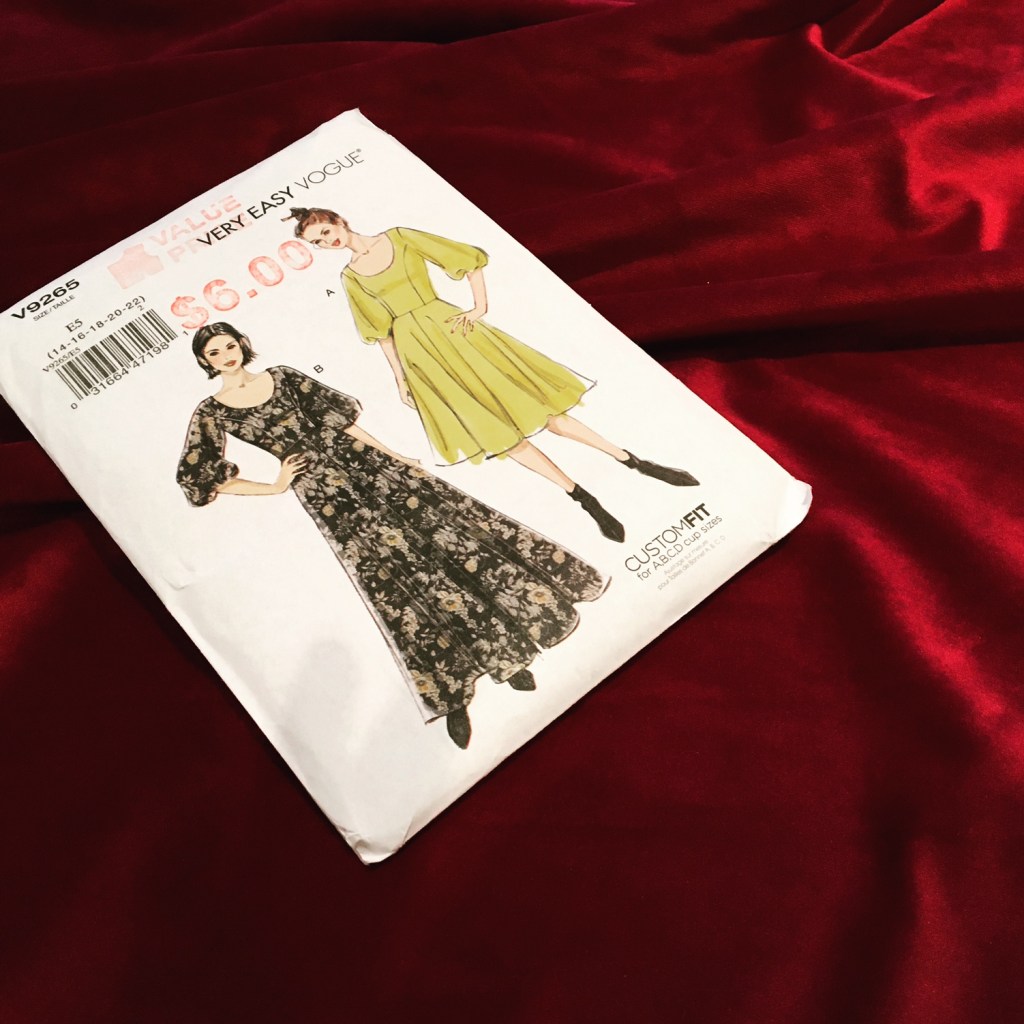
That is exactly happened with Very Easy Very Vogue pattern V9265. Some of the issues were my lack of patience, some the pattern design and some were just due to not having access to a proper fabric store with the ability to buy notions.

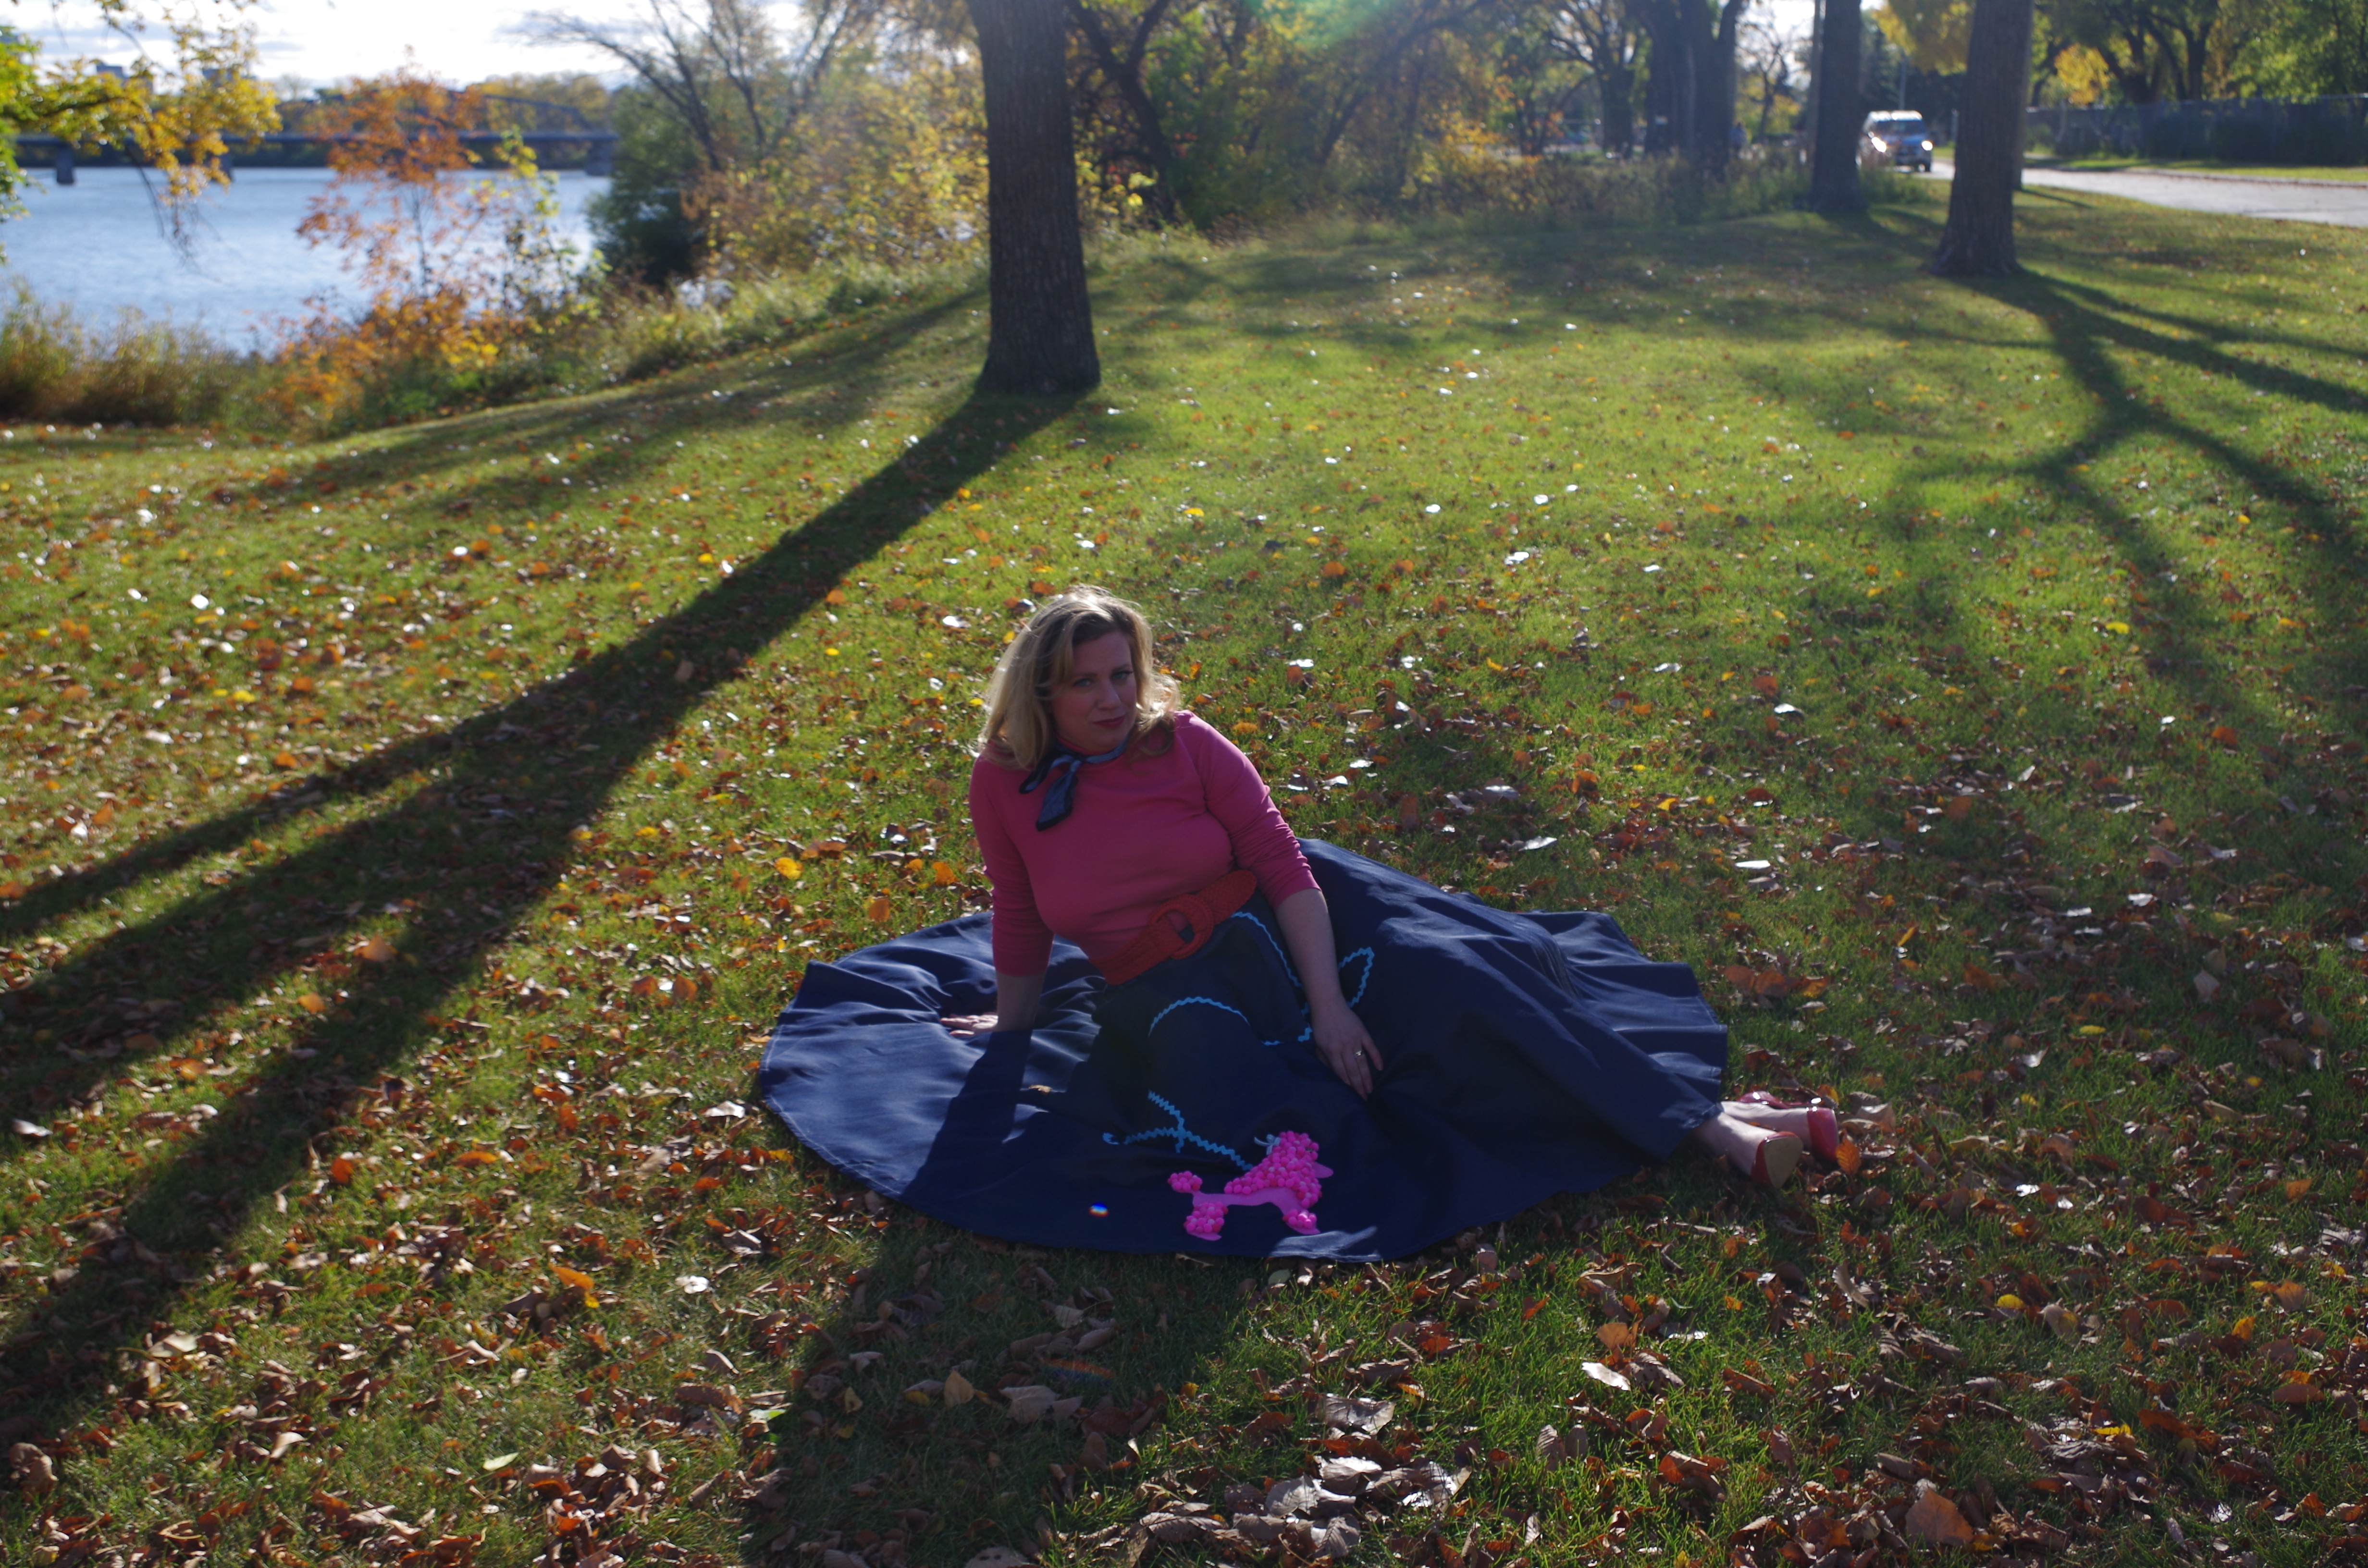
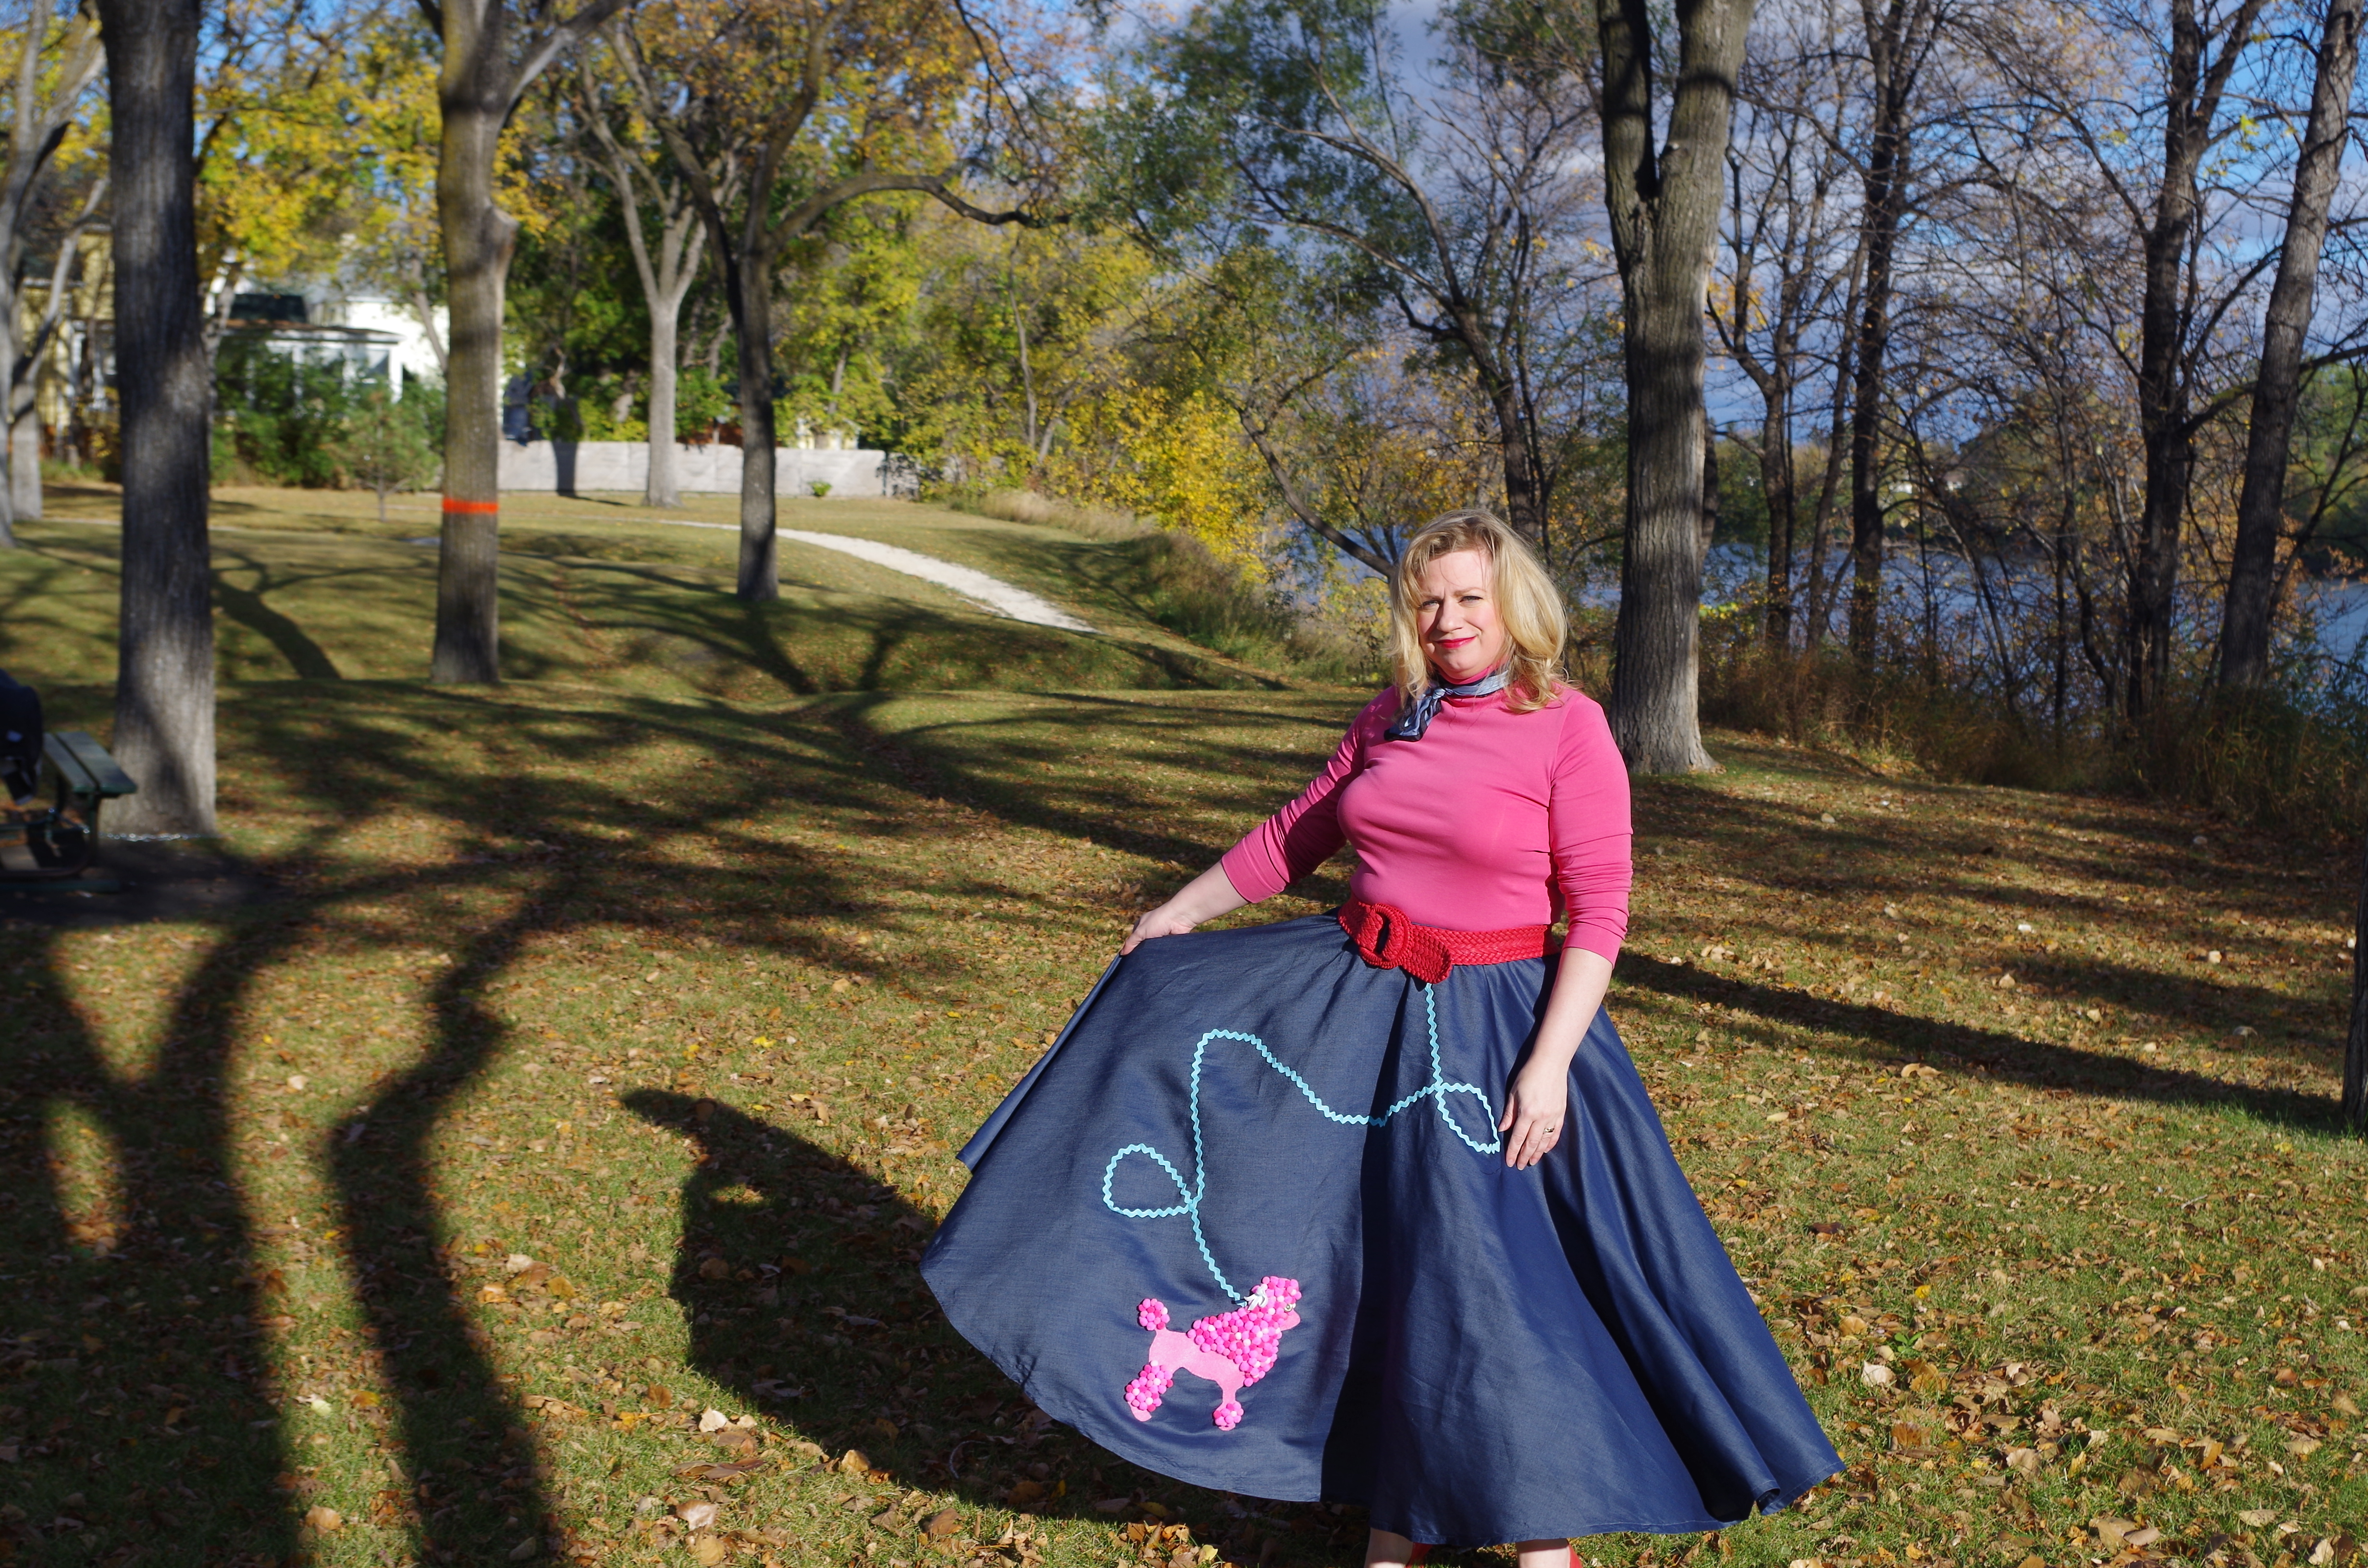
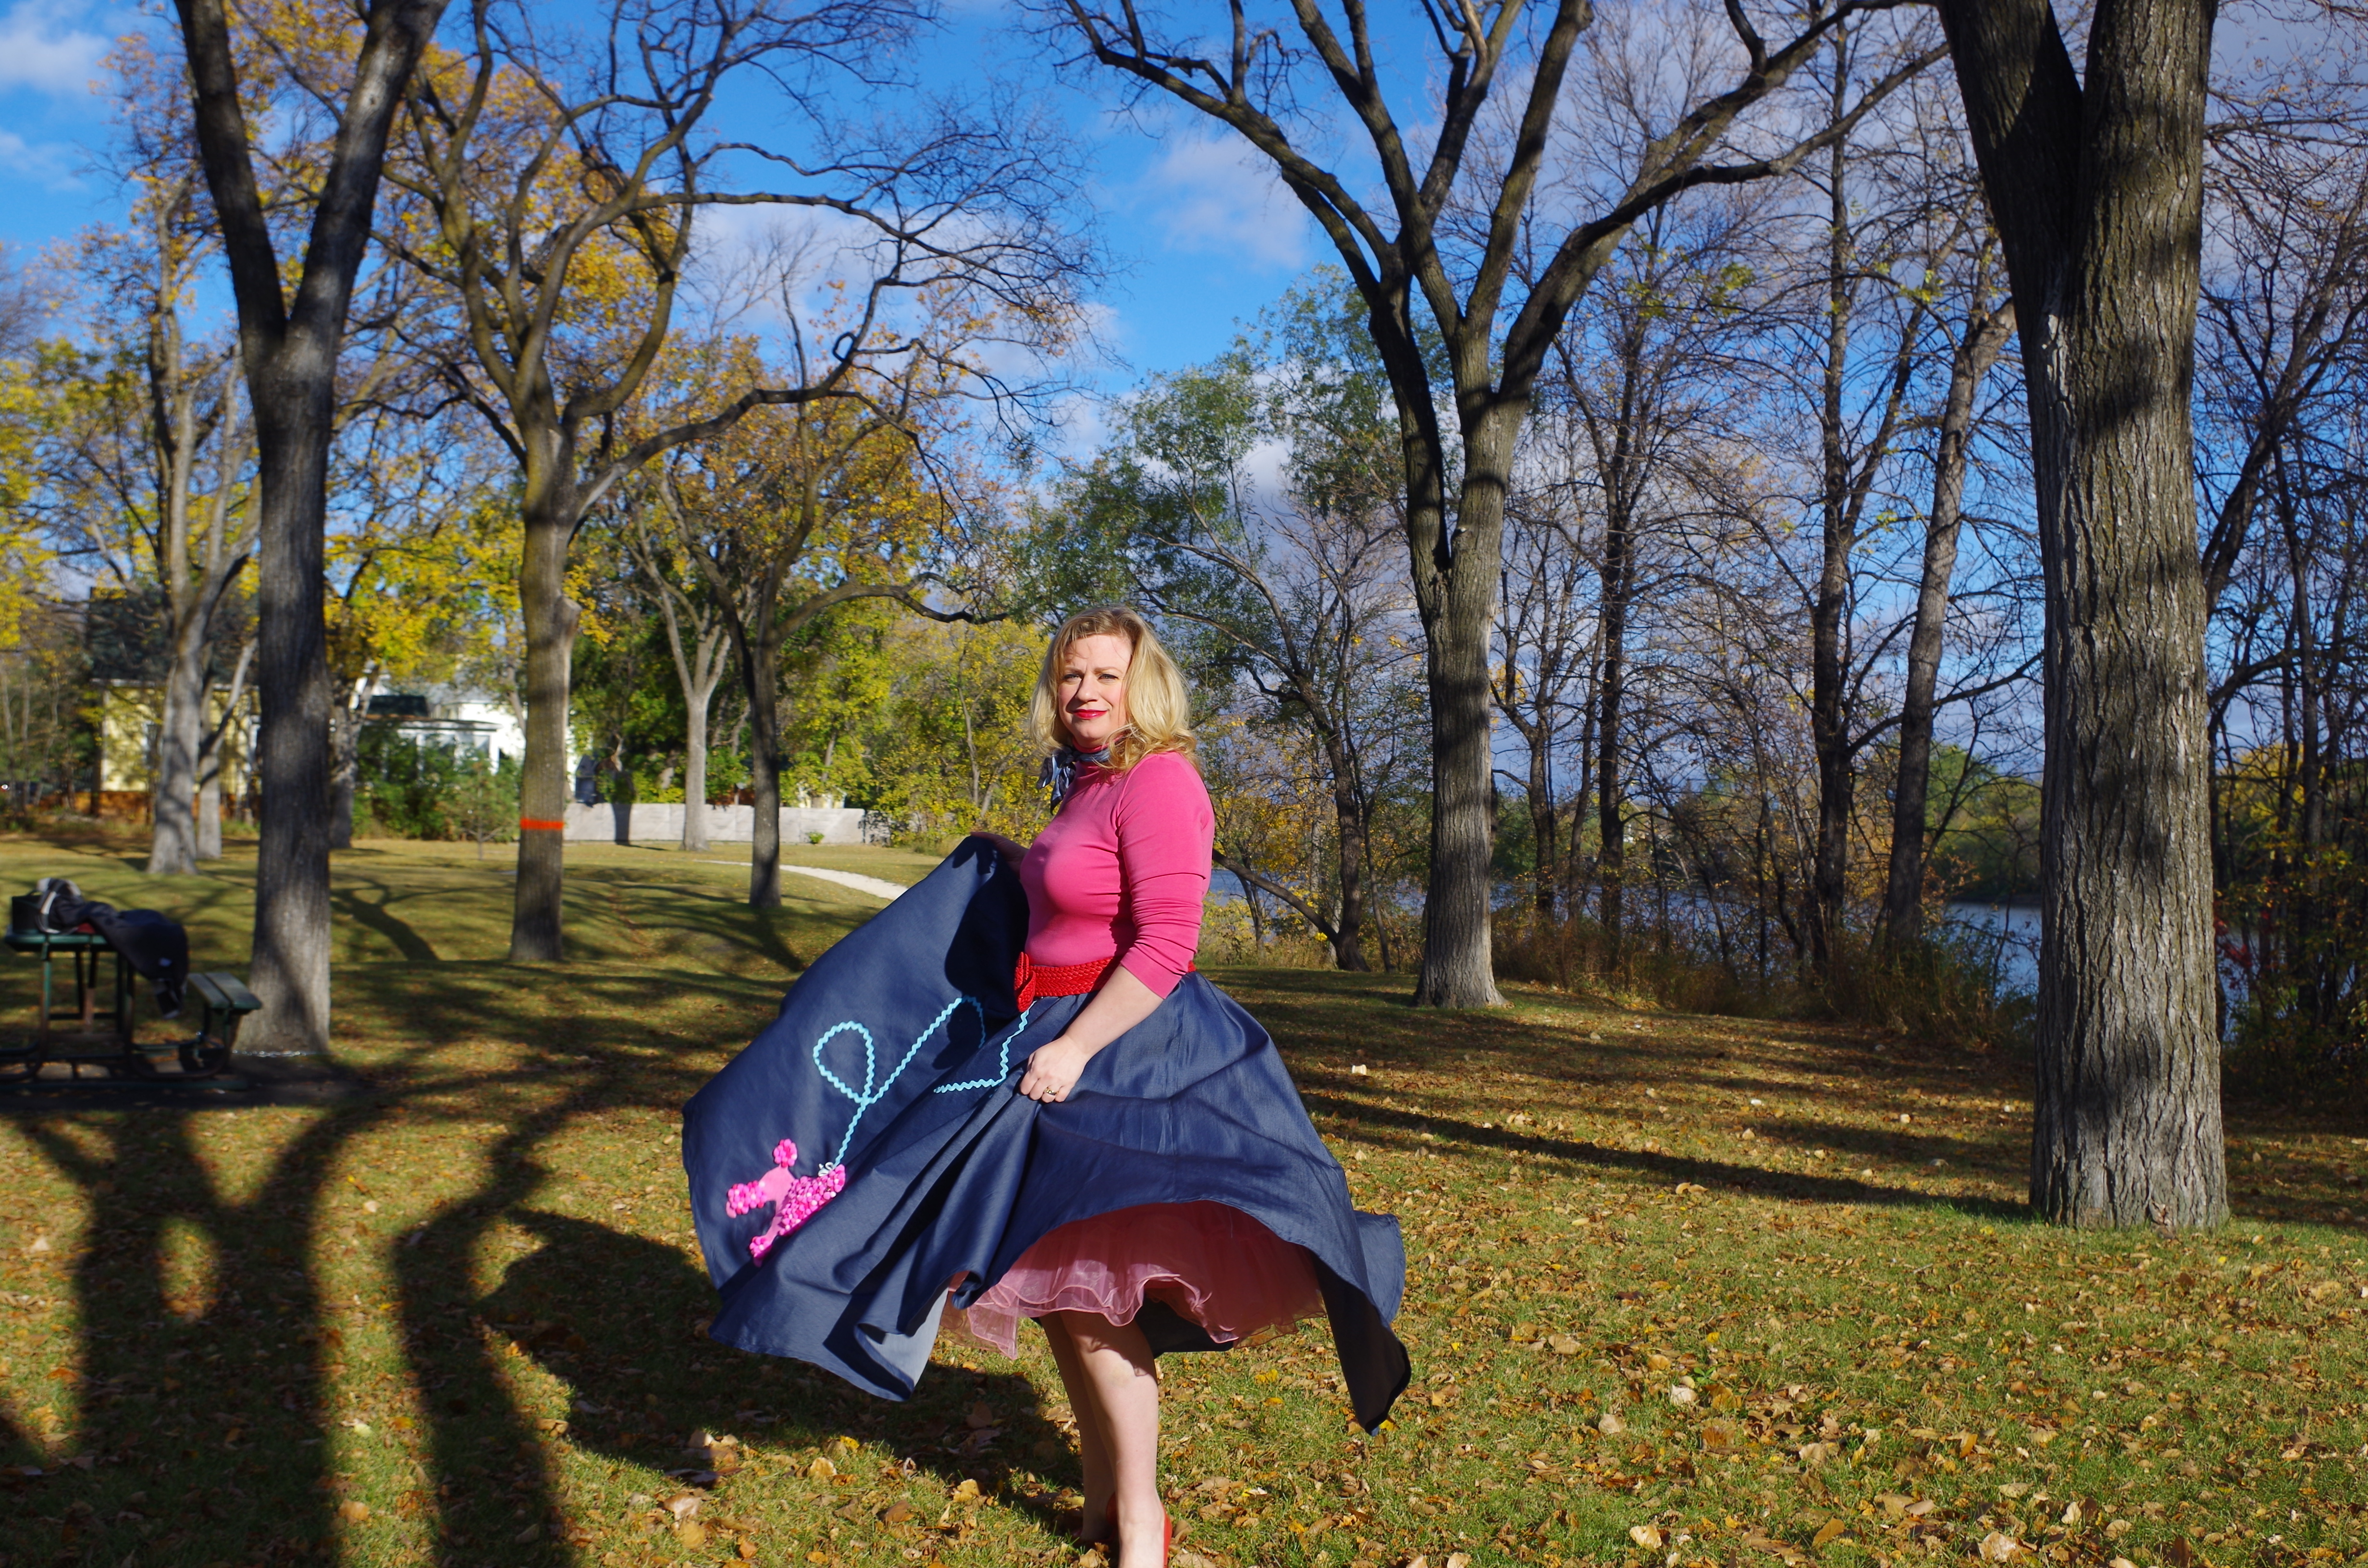
See that glass of wine in my hand? I really needed it after this sew. Let us start with the fabric, it said I could use Velveteen and I found it but it was really expensive per meter at Marshall’s fabric in Winnipeg so I passed as it would have been $80 for just the fabric. I was at Fabricland and they had ‘Velveteen’ in their clearance section at $12/meter and I bought it without a thought. Hmmm…this was a critical error as the velveteen the pattern seemed to ask for is a cotton blend with no stretch, the one I got was polyester with a bit of stretch. I learned that the cushion of the velvet can move under my presser foot…but add some stretch in there and it was a colossal mistake. Although the stretch came in handy for Problem #2.

I cut the 18, like I usually do (I usually take it in a bit where needed) but once I got the bodice done and was ready to attach the skirt…something was really wrong. They were not the same size. I checked the pattern pieces and the instructions and it seems this was intentional to get a nice tight waist. They tell you to slit the pieces on the skirt and stretch….holy kaka, this just didn’t work for me, no amount of pulling was going to get it to match. I had to take in the bodice and I have a bigger waist so this was a big gamble. The only saving grace here was that velvet had some stretch in it. I wasn’t sure how the lining would work but I was prepared to using facings in the dress if I couldn’t line it.

Finally, the last issue was the zipper. I basted it and put it in 3 times, using a regular zipper and it just wouldn’t work. The velvet slid all over. I can put in a zipper any which way but not on this fabric. I decided to try an invisible zipper with my new invisible zipper foot for my ancient Husqvarna machine. I spent a good hour adjusting every dial to get it to center, the part wasn’t made for my machine so it took a long while to get everything just right. It works but not easily. At one point I pulled out my old Elnita to sew the zipper but …it needs servicing so it was a no go. 3 days later….I realized I also had an issue with the new bobbins I had ordered for my machine. They work…but are not exact. After figuring out you had to flip them to get them to work I was ready for the invisible zipper. But the only one I had on hand was really old….from the 70’s or earlier. I can’t buy a new zipper because the stores are closed here and Amazon is faster than curbside pickup but it takes a while. This zipper has kinks, it’s stiff and the fabric is stiff. It is not a great zipper in anyway. After 2 attempts, I got it in. Is it perfect? Ummm no. It matches at the waist but the top is uneven. For the time being I put a button closure at the top back to cover the slight irregularity. At some time in the future, I will replace that zipper with a good one that isn’t older than me.

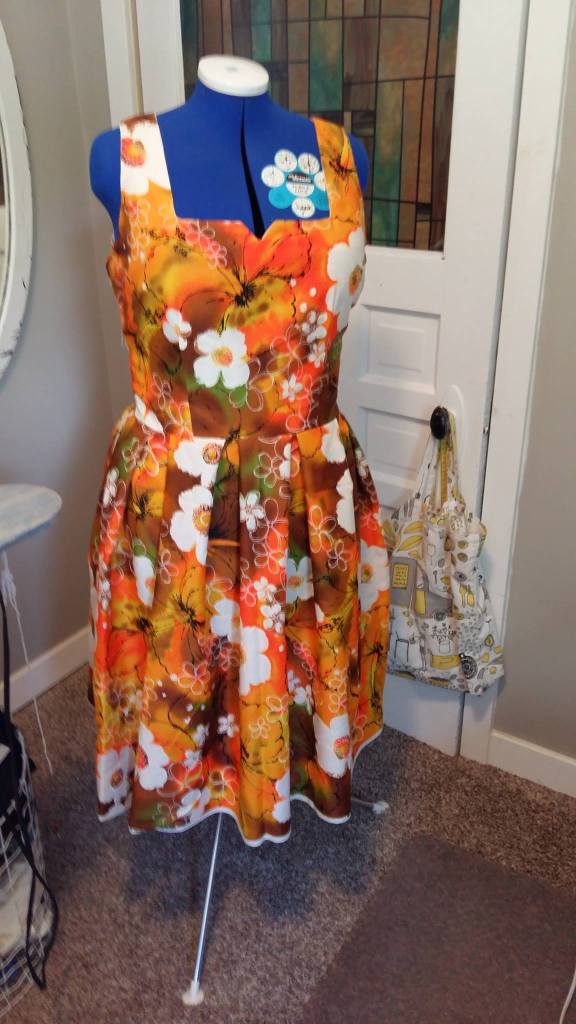
In the end I got my party dress for 2020! I struggled with it even though it didn’t have too many pieces but it really taught me that if there is a will there is a way…and also, that designer patterns are sometimes easier than ‘very easy’ because they are designed better. Overall, I like the look of the dress but I did not like the way the pattern was designed. Who the heck thinks to make the waist of the dress smaller on one pattern piece?

Cheers to the New Year and My New Dress!

Selling Patterns 101

If you have come to my blog from my Etsy shop Stylesewciety, then you already know I sell vintage patterns. If you didn’t know before…tada! I sell patterns on Etsy in a shop called Stylesewciety. If you haven’t visited the shop, I encourage you to do so because I have lots of out of print vintage patterns. If you sew, you know how limiting the pattern books your local fabric store are, vintage patterns open up a whole new world of possibilities. I guarantee there is likely a pattern to match your imagined project out there, somewhere.

I titled this blog post ‘selling patterns 101’ ironically because I am not an expert on selling patterns. What I like to do is pick patterns that I see potential in and give others the opportunity to acquire them. I genuine love these patterns and the history that comes with them. Like who bought this pattern and if it’s cut, I like to think about what the person made with it. I also like taking forgotten patterns and giving them another chance.

Selling patterns is a lot more complicated than I thought it would be. I thought it would be just about sharing creativity with others but it’s really tough finding a balance in the business of patterns. Often I am emailed asking if I can lower my prices, unfortunately that’s not possible because a lot of work goes into each pattern. I have to find them which takes time, I have to check each one over to count pieces and check for damage, then you have to re-package them neatly (which is easier than done) and then recheck them prior to mailing and re-package neatly again. Then I package them for mailing, double check the packaging for security and potential issues with the customer address. Then I drive it to the post office to ensure the quickest delivery and security which sometimes means waiting in line for quite a while. It takes quite a bit of time and patience to get it right. When I sell a pattern, I actually don’t think I make a lot of money. One time I counted the hours and my profits and it was not in my favour…. which is why I think of it as sharing creativity instead. I enjoy the idea of how much pleasure that pattern will bring you.

December has been a tough month for me in regards to selling patterns. It’s not about the amount I sold or didn’t sell, it’s the management of expectations. In a world with Amazon Prime, many people expect to pay very little for shipping and get the Prime delivery with tracking and have the pattern in their hands in less than a week. I am also an Amazon Prime member and completely understand why people think the world works this way, I too want you to have your purchase in 3 days. However, I am a small shop and I don’t have the assets of Amazon to make this happen. I am stuck with Canada Post.

Right now, my own purchases from Etsy took 3 -4 weeks within Canada. I am almost certain their timelines outside of Canada are falling well behind as well. I have had so many customers ask me where their pattern is weeks before the end of the shipping timelines and they are disappointed when they don’t have it right away. I feel horrible because I know what it’s like to not have something you need for Christmas. I ordered my Christmas patterns in October but some people didn’t order until mid-December.

In order to keep ahead with customer expectations, I have decided to put a message on all my listings so customers are directed to review timelines before purchase. Also, I want people to know that I can provide quicker shipping or tracking, if they want to pay for extra fees. I always assumed that others would prefer to pay less for shipping and wait longer but in this last month I have realized expectations are so high around this time of year. I would rather offer the service than someone be very upset their pattern didn’t arrive in time for them to sew for Christmas presents.

So with Christmas around the corner, I am delighted to know that many sewers got their patterns in time for sewing presents, making that New Years dress or knitting that vintage sweater. I am hopeful Canada Post will do their best to get the patterns still out there, in by the end of shipping timelines. I am excited about offering more choices about the shipping so those who really want that pattern in 3 days, and don’t mind the cost can choose that service.

Lockdown with No Overlock

I am midway through a pair of winter shorts and have a dress all cut out but both of my overlock machines are in the shop. We are in a lockdown in our city, which means we have to stay at home as much as possible. Stores and restaurants are closed for everything except pick up service, you can’t socialize with anyone outside of your home and gyms, pools, libraries are closed. If I didn’t list it, it’s probably closed. Without my overlock, which I use to finish all the seams on my projects, I feel a bit nuts.

When the press conference announced we would be going into a lockdown, I ran upstairs to tell my husband to book a grocery pick up spot at Walmart, so we could get our groceries without crowds, thinking back to panic buyers of the Spring lockdown. My second thought was to call the sewing machine shop and ask about my machines…..’Are they fixed?’ They assured me they would be allowed to bring it to my car when it’s time to pick it up but I would have felt a lot better if I could have picked them up right then. Everyday, I want to sew but I am stuck. I could use pinking shears or zig zag but it’s not the same look. I feel like my projects look more professional with the overlock finish so I have to wait.

I have turned to knitting, something I haven’t done for close to a decade. I listed some lovely sweater patterns on the site with more in my bin to list in the next few weeks and actually ended up inspiring myself to give it another try. I grabbed some wool from my favorite source – Value Village . You can get a whole bag of wool for the price of 1 ball at specialty store so it’s a great place to pick up practice wool. I pulled out my how to knit book but the rhythm came back without having to reference the book. I guess your hands really do have memory for that kind of work. I am working on a scarf for now because I am trying to ramp up my stitch speed and accuracy but when I am done, I have all sorts of plans…..

The lockdown in the Spring and now have really opened my creative side. I always like to make things but I never seemed to have any time. Projects were far between.

Now that we are home so much , I love all the time I get to spend sewing and knitting. Spending more time with my husband is also a nice feature and my very senior pug puppies are really enjoying us being at home. I even have more time to call or visit my parents (pre lockdown), something I realize I should have been doing more of pre-covid. The virus is a terrible thing but what I hope we can take out of it is to live life at a slower pace, spend more time with family and on ourselves. I still work full time remotely but at the end of the day and on the weekends, there is always time for the things that I realize matter the most.

Inspirational or Aspirational

When you sew is it because you are inspired or you want to inspire others with your creativity? Or do your sewing choices reflect your aspirations?

Upon reflection of my past sewing projects and boxes of planned projects, I think I tend to operate on the aspirational side of sewing. I sew what I want to reflect, what I want to experience. I don’t sew sweat pants, I like to sew fancy dresses. What attracts me to a pattern is a bit of a dream of who I want to be.

It’s a bit like the old time movie glamour, back in the day they dressed actresses in high end couture for movies and I think that really reflected in the fashion of the day. People didn’t wear jeans to the movies, even men. I love my jeans but I also like to dress up, for me. It simply makes me feel better.

In these bleak times, where we are isolated in our social bubbles, eating take out at home in yoga pants, it’s nice to dream of days when there will be weddings, cocktail parties or even the office Christmas party. From my Etsy shop statistics, I can tell that more than a few people are day dreaming with me and sewing for a better tomorrow when we can burst out of our social bubble.

So while we are waiting, why not sew our dreams into reality, with some glamour at home. I have my project planned, do you?

If not, please look through my Etsy shop for some absolutely amazing vintage gown patterns https://www.etsy.com/ca/shop/StyleSewciety?ref=simple-shop-header-name&listing_id=884887947&section_id=29874378

Red Velvet, full sleeves….Hello Christmas Dress

Just Pleat It 2020

I never thought in a million years that pleated pants would come back….ever. I remember sorting through all my work pants in the early 2000’s and getting rid of any evidence that I ever wore pleated pants. Fitted, flat front pants are all that I have worn for more than a decade. If I am being honest, I rarely wear pants because fitted pants make me feel self conscious. However, I should have known that fashion always comes back to bite those decisions, where we discard something so lovely.

Pleated, soft fitting pants that brush against, instead of hug your curves? They can actually look pretty nice. Before sewing a pair, I bought a cheap pair on clearance for $9 to see how I liked them on me. I loved them! They didn’t make me look fat as I expected they would, they felt like joggers but looked classy. They have become a favorite in my ‘working from home’ Covid wardrobe, ever since.

I went through my vintage patterns to see if I had a pattern to suit my ambition. At first I looked at this DKNY pattern but when I did a paper fit, the pattern was a bit tight. For my first pair of pants, I did not want to modify the pattern so this pattern was not the right one for me.

I loved this pattern for my pants but the size was too small for me

Luckily, I found this lovely McCalls pattern, I had set aside a while back. I even wrote ‘great pleated pant’ on the front of it, so my past self was looking out for me.

McCalls 7952 – version B

Back in 1994, I owned an almost identical pair of pants. I had saved up my babysitting money and bought a pair of navy wool pleated pants from Club Monaco. I wore these pants everywhere. This was at a time when most teenagers were wearing rips jeans and plaid shirts….so I was a bit ahead of my peers. I even wore them on dates….that poor 16 year boy was expecting a short dress….I covered myself from head to toe in 1990’s office wear.

1994 – I loved these pleated wool Club Monaco Pants!

When sewing a new type of garment, I always use cheap fabric and baste. I used to skip basting but that little step really helps you get a better fitting garment. When I say cheap fabric, I usually mean whatever I can find at the thrift store which could be Italian wool to polyester suiting. If you can get a few meters for under $5, you don’t feel so bad if you make mistakes. I was going to make these pants in a wool I bought from a Paris shop that sold offcuts for Chanel…but my friend strongly suggested I use the cheap fabric first. She was right, not because I was going to mess up but because it made it worry free to sew them. The fabric I used was a light weight almost tweed suiting, not wool but it had the weight of a gabardine….and it was under $5. I found all sorts of goodies for these pants in my thrift store sewing bins….total cost of all supplies and pattern was $10.

This pattern is so easy to sew, once you realize the zipper is in the back. I didn’t read the instructions so I was very confused when I got to the zipper. I felt pretty foolish when I realized my mistake. They turned out really well and even though they are not fitted or flat front, I think they are kind of sexy. What do you think?

I hope I have inspired you to make a pair of pleated pants this year. If you are looking for great vintage pattern to make your own, check out my shop on Etsy. I have patterns for all sizes and tastes, see link below:

https://www.etsy.com/ca/shop/StyleSewciety?ref=simple-shop-header-name&listing_id=884887947

Just pleat it 2020

Fast, Easy and Cute Halloween Costume

Halloween may be cancelled in 2020 but have you ever found yourself invited to a last minute costume party? I have and it’s a pain in the butt trying to put something together. I also refuse to buy another cheap pre-made costume because they are just plain awful. I relented once and ended up with some highly flammable outfit built for a 12 year old girl that said it was ladies large.

This year I decided to re-create a costume my mother and I made many years ago when I was very skinny – a poodle skirt! I loved my poodle skirt, it was the perfect throw together costume. It was comfortable, looked classy and since it was hand sewn, it looked very special. Unfortunately, I am no longer the skinny mini I was back when it was sewn so I had given it away to charity. I lucked into a pre-owned pattern for a poodle skirt and jumped on it. I also love re-using other people’s patterns, it’s a bit of a rescue syndrome. I feel like if I use it, I have given it another life.

This pattern is so easy because it has an elastic waist band, the poodle and ribbon trim is glued on and if you sewed it in felt you wouldn’t even have to put a hem on it. Honestly, if you wanted to, you could throw this together in about an hour.

I am bit particular about my projects and decided to hand applique my poodle and leash. I used a embroidery hoop, put on some Netflix and went to town with pom poms. If you have the patience, I would suggest you go this route so you can use this costume over and over without risk of stuff falling off.

I chose a chambray for the base skirt and I think that was the way to go, it has such a nice flow when you move. I used a crinoline I already owned with the skirt. You could sew one as per the pattern but the supplies will likely be the same cost as buying one from Amazon.

Of course, it was one of the windiest days we have had lately! My hair and skirt were all over the place. However, I am all prepared for costume party emergencies, feel free to invite me:)

Should I buy a ‘cut’ pattern?

When looking at patterns at a thrift store or online in a place like Etsy it can scary looking at a pattern described as ‘cut’. Oh the horror! Someone used it before!!

Patterns are one of the things that are completely reusable, for you and for others after you, to enjoy. When I use a cut pattern, I like to think about who used it before and what they made with it. A pattern is a guideline, there are so many things like fabric choices and finishes that can make a finished garment look different from the pattern.

When cut patterns can be an issue is if pieces are lost or the pattern has not been cut to your size. I feel pretty confident buying online because the shop owner reputation rests on the accuracy of what they have sold me. The best part about cut patterns is the pricing, uncut patterns are simply more expensive. If the pattern is cut and in my size, I will buy it over an uncut pattern. The bonus is someone has already separated the pieces for me and that gives me more time for the fun part of sewing.

I recently picked up this pattern in the Misses size, already cut. Ironically, I had sewn this pattern about 12 years ago when I was a size small. I absolutely loved my poodle skirt but finally gave up on being a size small and gave it away. When I saw the pattern again but cut in a size large, I grabbed it.

As it was already cut, the laying out of the pattern was so easy. I hope to fit in some sewing this weekend so I can sew this fun little skirt for myself. Everyone needs an emergency costume to pull out for those Halloween socials.

So when you see a pattern that is cut, don’t be afraid to buy it. It still has value and you can still make wonderful things.

If you are sewing a pattern, always remember to put all the pieces back in the pattern so someone else can enjoy your pattern afterwards. I like to pin the pieces to a bulletin board as I unpin them from the fabric. When I finish sewing, I put them all back in the envelope together.

Happy Sewing!

Going the Distance – Retro Pattern Revamps

I love retro pattern…pictures. I admit I buy a lot of the retro reprint patterns that Vogue, Butterick and McCalls put out but have not sewn them…until now. It’s an itch I can’t get rid of as I always wanted to be in a movie like Roman Holiday. I would buy vintage dresses if I could but I am in the modern size 16 sewing size range and there are few dresses out there with those measurements. The only way I can get one is if I sew it. My first attempt at a vintage dress was a modern pattern by Gertie. It has the look of a vintage pattern but the instructions were so well laid out. It was easy to sew and looked fabulous when finished. I would recommend any of her patterns to a beginner wanting a dress like this (you can add a crinoline under it if you like).

This Spring I decided to try one of the retro reprint patterns in my stash, I even let my husband pick the pattern for me out of a few options. Of course he picked the most complex pattern. These retro reprints seem to be resized for the modern women but I am not sure how updated the instructions are. I have sewn average patterns before but the instructions on this one, they were so confusing.

The pattern I/he chose was McCalls 7448, version A.

Deceptively easy looking…..

It took alot of fabric so I used Downtown Abbey print quilting cotton. I don’t usually sew clothes with quilting cotton but the price was right. Actually, I was surprised at how nicely the cotton looks in this dress, the body of the fabric is great for the full skirt.

The skirt for this pattern: easy. The bodice for this pattern: easy. The straps for this pattern….the instructions and pictures are so confusing, I rate that part as difficult. If you sew this pattern, baste those straps when you get confused. It was a bit like a puzzle trying to figure them out. It took me a few months to finish this dress because I would get frustrated and walk away for a month. It can be done in a weekend but you need to be patient and take your time. I never sew a muslin and I never baste….but those straps taught me that basting and muslins have their value.

I did not sew the crinoline because it was cheaper to buy one ready made. Also, having a removable crinoline makes it a less fussy dress if you want to wear it more day to day. Who says you can’t look great buying groceries? I did not sew the cummerbund because I thought it might not be so flattering on me. I am going to look for a belt for the future.

Now to the positive, I love this dress. It is so feminine and it feels great on. I think it’s the perfect dress for a outdoor wedding or a date. Basically all those social occasions we can’t do right now with Covid….so mine is going to hang in the closet for a bit. In the meantime I wore it to the park on the weekend for pictures and felt fabulous. What a wonderful dress to twirl in.

For all the frustrations on this pattern, the end result won me over. I would recommend it to a friend with the kind suggestion of have patience and baste! baste! baste!

Opian Pilatus Swimsuit Review

Winter white skin in my first hand made swim suit!

I never thought I would sew a swim suit or even touch stretch fabric because my mother had warned me that stretch fabrics were very difficult to sew. As I looked through patterns over the last few years, I would continually change my mind once I saw they called for knit fabric – tossing them back at the Fabricland salesperson like they were the devil incarnate.

Then I fell in love with Burda Style magazine and many of the monthly patterns were sewn in knit. So many are listed as easy to sew that I began to wonder if knit fabric was that difficult to sew after all. When I organized a Meetup group for local sewers I decided to plan the events around challenges for myself. I figured if I put it out there that I was going to sew things and put a date on it, I would be held accountable for actually doing it.

I decided the first sew along would be a swimsuit, no-one else signed up (I think swimwear is scary for a lot of people) but I figured I threw down the gauntlet so I had to sew it. Hello knitwear sewing.

I picked this pattern off The Foldline https://thefoldline.com/sewing-patterns/pilatus-swimsuit/ because they had posted a list of the 10 best bathing suit patterns and this was on it. It was also similar to a Modcloth suit I had seen online that was kind of expensive: https://www.modcloth.com/shop/swimwear/modcloth-the-siena-one-piece-swimsuit-in-orange/163819.html .

For fabric, I went to Fabricland and although there wasn’t much choice, I did like this print. In total the supplies were about $45 plus the price of the pattern. It wasn’t cheap but the suit is very high quality and it’s still cheaper than the $150 I would have spent on the Modcloth suit after duty and taxes. I am going to call it a budget win!

I used pattern weights and a rotary cutter to cut out the swimsuit and I feel like that made the cuts very precise. I had never used the rotary cutter before but now I am not sure I can go back to regular scissors. This method of pattern cutting is extremely fast. Less time on cutting means you are closer to getting something finished.

I added a nude lining to the bottom after reading someone else’s review and I am glad I did because it makes the suit more substantial (aka not see thru). I also added swimsuit cups (which I recycled from an old suit) because they added shaping and modesty to the bust. There are some mighty cold lakes in Manitoba, if you know what I mean.

Basting the lining into the bottom

Another option I did with the pattern was hand basting the layers together. It took a few extra minutes but it held the layers in place for sewing. I used my serger to do the majority of seams and then a 3 point zig zag to do the elastic parts on my sewing machine. Thanks to Youtube sewing videos, I was able to do the elastic in the legs because the pattern didn’t explain how to evenly distribute it. For anyone doing their first suit, I divided the elastic into 4 and marked it and then did the same with the leg holes. I matched up the marks, pinned and then gently put it through the machine giving a slight pull to get it to match up. Seriously, what did we do before Youtube?

My 2nd more successful attempt at elastic

The back of the suit looks really nice

The fit of the suit is pretty good overall. I had to sew the largest size so I wasn’t sure if it was going to work out. The pattern does not have extra room for a rounder bum or bigger bust. I am not skinny but I know there are ladies who would look great in this who do need a bigger size of pattern. I like that the big 4 patterns go up to bigger sizes so you don’t have to do much to cut the pattern with extra room where you need it. This pattern company did not think to add more sizes so it lost points for me there. Also, the bottom looks great in the picture but my bum feels like I am showing more skin than usual. I think it’s designed like that and it is secure but ….I am insecure. You know what I mean? (Yikes I am in bathing suit!).

Getting started…

I decided to start this blog as a way to keep myself on track with my sewing projects. I don’t think I am the only one who starts a project and then sets it aside for months. I thought this blog might be a great way to talk about my projects without boring my super sweet husband who always tries his best to look interested while I talk about the different techniques I used.

Continue reading “Getting started…”